DIY Headbands Inspired by Jess Ekstrom
Former Girls on the Run participant Jess Ekstrom started Headbands of Hope out of her dorm room in college. The idea was simple — for every headband purchased, one was donated to a child with cancer. This small act of kindness blossomed into a global movement, with headbands donated to every children’s hospital in America and 15 other countries. Jess’s headbands are now a symbol of kindness and positivity for everyone who wears them!
In the joyous spirit of the Girls on the Run 25th Birthday virtual event — where Jess will be the host and emcee — we’re sharing this DIY headbands activity. Consider making one with your girl and inspiring her to spread kindness by making one for a friend or loved one. Whether the headband adds personality and pizazz to her outfit or ignites a fire in her to give back, this DIY activity is sure to spread smiles all around!
Supplies:
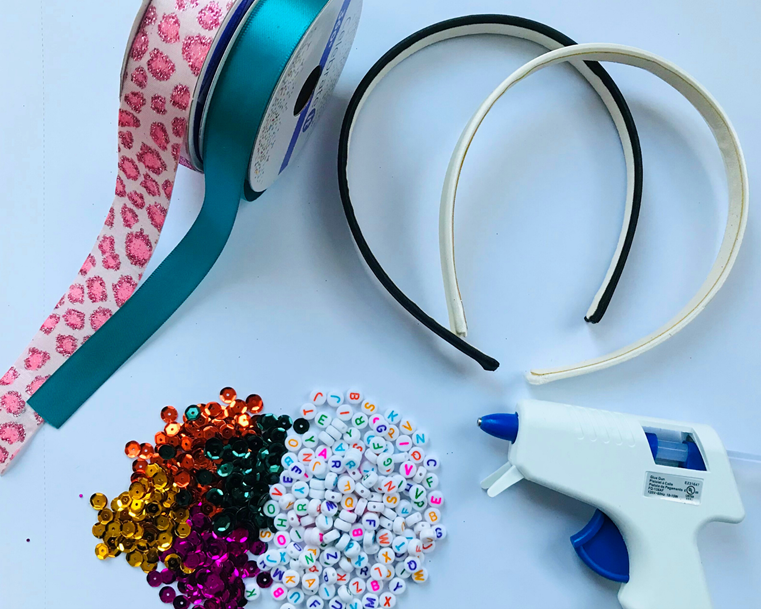
- 2 plastic or satin hard headbands
- Decorative or solid-colored ribbon (two pieces that are about 3 feet long)
- Sequins, beads, buttons, pom-poms — any decorative elements (maybe found around the house!)
- Super glue or hot glue gun (parental/caregiver supervision and assistance should be involved)
Steps:
1. Place a small dot of glue on the back of one headband towards the bottom/end of it.
2. Stick one end of the ribbon to dot of glue. Be sure that the ribbon is secured firmly.
3. Wrap the ribbon tightly around the headband at a slight angle.
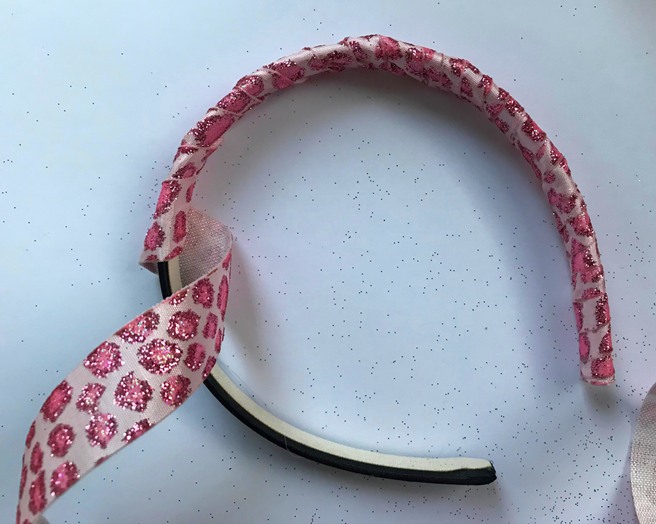
4. Periodically pause to add a drop of glue to the headband. Continue with wrapping the ribbon around the headband, so the ribbon comes in contact with the glue. This will help ensure that the ribbon stays tightly fastened to the headband.
5. Once you reach the other end of the headband, add a drop of glue to the back of the headband. Wrap the ribbon over the glue firmly, to secure the ribbon to the headband. Use scissors to cut off any excess ribbon.
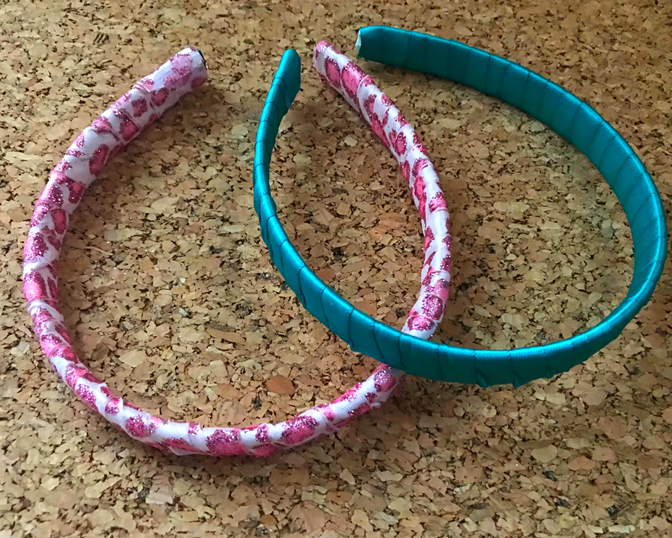
6. Repeat steps 1-5 for your second headband.
7. If you used ribbon with a pattern, you may wish to stop here! Set aside your headband to allow all glue to harden. If you used plain ribbon (or still want to pizazz your patterned ribbon headband even more!), continue on.
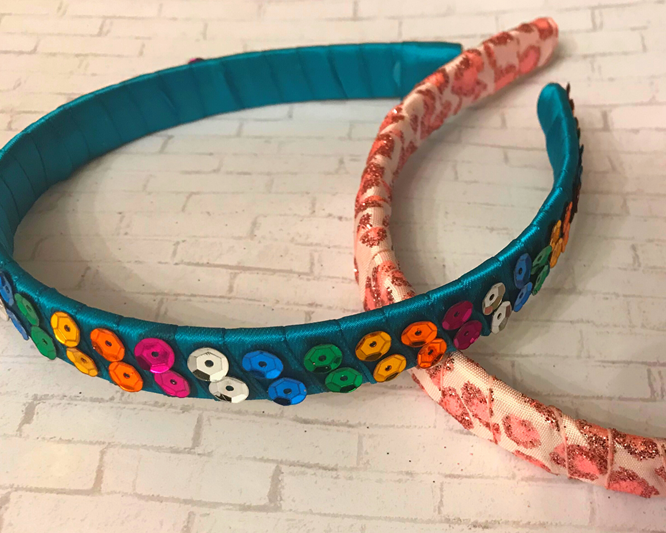
8. Gather your fun “extra” decorative supplies, such as sequins, beads, buttons, pom-poms or whatever inspiring creative accents you have.
9. Have fun gluing these fun extras to your headband. Consider using a pattern, spelling a word or making it totally random. Whatever inspires you!

10. Once finished with both headbands, think about a friend you might want to share one with.
We hope this activity inspires you to join Jess at our celebration by RSVPing today!